FREE LD product

FREE LD product
FREE Giraffing Out Aloud Product worth $40+ when you open a LD account

Tuesday 24 December 2013

Candy Cane


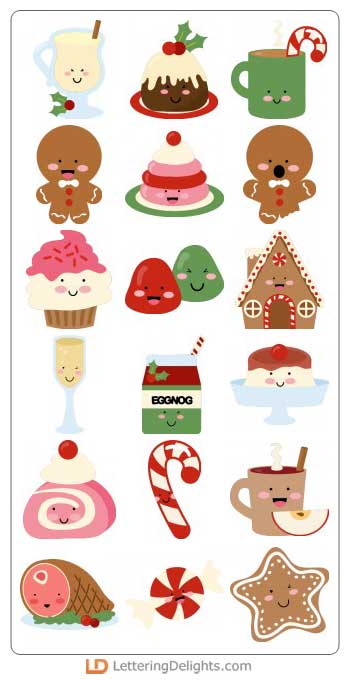
Here is another quick card using Print & Cut with my Pazzles Inspiration and the recently released LD Christmas Calories cutting files.

Electronic Die Cutter 468x60

I have used the Candy Cane cutting file from the same file and placed it within a rectangle shape.  I made an in-line of the rectangle and used the Rhinestone Feature to make my dotted border.  I selected one of the rhinestones and filled in in red using the colours from my svg palette.  I just placed my image within the rectangle.


I then, created my own sentiment using one of the fonts already installed on my computer.  I just alternated the colouring of the lettering using my colour palette from the svg file.

I just printed the card using my printer without the need to make any registration boxes as it was simple enough to cut around the outline using my paper trimmer.

At the moment, I am suffering from Pleurisy (which is quite painful) and I am behind in posting my projects, which will now have to wait until after Christmas.

So, here is wishing everyone of my followers on my BLOG and FACE BOOK PAGE a Happy Christmas and a healthy New Year.  

I appreciate everyone of my followers and all the comments that you leave on my blog, which inspires me to continue to post here.

Hugs and best wishes for 2014 ~ Joanna

Cutting Supplies:-

LD Christmas Calories - cutting files


Joanna x


*****


$99 Craft Room Vue 468x60

Monday 23 December 2013

Festive Soap Container


I thought I would show you a super quick, fun post using my Pazzles Inspiration cutting machine with vinyl.  I saw this hand soap container at my local supermarket and loved the colour of the soap.  I thought I would use a cutting file from the Pazzles Craft Room to give it a festive look.


I don't know about you, but having 3 kids we get through bottles of this stuff.....at least I know they have relatively clean hands!


I began to peel the sticky label off by hand....quite easy to do.


I then dabbed some Sticky Stuff remover onto a kitchen paper towel.


After a bit of rubbing the sticky residue comes off.  
I then took a baby wipe and cleaned around the whole soap container.


 I imported the Deer into my software and resized the image.  In the cut menu I selected the weed option, placed some gorgeous glitter effect vinyl onto my mat and cut out the deer.  I weeded the vinyl really easily and on this occasion didn't even need to use transfer tape as it was easy to lift off the mat and place onto the front of my soap dispenser. 


I have been wanting to use this Deer cutting file for a while and the kids love the festive soap dispenser, even more reason to wash their hands!

Supplies:
Deer cutting file - Pazzles Craft Room
Pazzles Cutting Machine – 99.00 Dollar Special

Electronic Die Cutter 468x60


Thousands of Images 468x60

Friday 20 December 2013

Christmas Ornament Shaped Card


Here, is my latest Christmas Ornament Shaped card for my Design Team project at Pazzles.  I have used 2 cutting files from the Pazzles Craft Room to make this simple card with my Pazzles Inspiration cutting machine.


I created myself a circle word sentiment using my Pazzles software, together with my Pazzles Pen Tool.  I refereed to a video tutorial  in the Pazzles Craft Room called Fitting text to shapes or lines to help me follow the steps.


Please hop over to my full blog post over at the Pazzles Craft Room HERE.

Supplies:
Ornament and Rosette cutting files - Pazzles Craft Room
Pazzles Cutting Machine – 99.00 Dollar Special
Pazzles Pen Tool
Rhinestone embellishment - The Mulberry Bush

Apologies for the brief posting, but I am suffering from Pleurisy and don't have any energy at the moment.

Joanna x

Tuesday 17 December 2013

Santa and Elf Gift boxes


Here are some simple Elf and Santa gift boxes I have made using my Pazzles Inspiration Cutting machine, for my latest DT project at Pazzles.   I work in a school,so I thought these could be put together very quickly as Christmas gifts for the kids in my class.  The cutting file is available in svg and wpc format in the Pazzles Craft Room. All you need to do is resize the box cutting file using your cutter software, and then they can be made as big or as small as you want.


Just by changing the colour of the cardstock and the trim you can change the look of the box.  I am sure fellow crafter's will have some more ideas.


Once the belt buckle and punched trim have been adhered you can fill with your treats.

I even used my Pen Tool in my Pazzles Inspiration to draw the stitching using a white pen for the braces.


I am so pleased with the way these gift boxes have turned out using my textured 
AC coloured cardstock from Handy Hippo.


For more details on how to create these boxes, please head over to the Pazzles Craft Room HERE.

Supplies:
Red, Green, Black and White AC cardstock - Handy Hippo
Cereal Box cutting file - Pazzles Craft Room
Pazzles Cutting Machine – 99.00 Dollar Special

Electronic Die Cutter 468x60


Thousands of Images 468x60

Challenges entered:-
Craftin Desert Divas - Christmas Link Party
Die Cuttin Divas - Holidays

Saturday 30 November 2013

Reindeer Action Wobble Card


The turkey leftovers are put away and the dishes are done. It's the perfect time to start on some holiday crafting. The Pazzles Design Team has put together a blog hop for you this weekend to give your Christmas card crafting an inspiration boost. Hop along to each of the Design Team Member's blogs and leave a comment. One lucky blog hop commenter will be chosen to win a Digital CD Download of their choice. Leave a comment on each designer's blog post, including  mine, as the prize winner will be chosen randomly from one of the blogs. 

Comments will close on December 5, 2013 at midnight and the winner will be 
announced December 6, 2013.


For my project in the Holiday Blog Hop, I have made a Reindeer Action Wobble Card using several cutting files from the Pazzles Craft Room Library.


I used the Christmas Package Tag shape to make the base of my card.  Easy done in my Pazzles software.  First of all, I made an outline of a duplicate tag. Then selected - DUPLICATE - MIRROR - WELD for the base card.


I used the Banner cutting file together with my Pen Tool to write my own sentiment.  I love my Signo white pen for doodling around the edges which gives definition to the card.  I also used it for detail on the reindeer's eyes and nose.


I attached my Reindeer (svg/wpc file) together with the Antlers (svg/wpc file) to an Action Wobble.


.........1,2,3 and off he wobbles.  

Supplies used for this project:-
Antlers, Reindeer, Banner, Tag - cutting files (svg/wpc file format) 
Cutting Machine - Pazzles Inspiration
Red & White Cardstock
Patterned Paper - Stampin' Up
Action Wobble Springs - Pazzles Store 
Pazzles Pen Tool


So, it's time to start the 
Pazzles Design Team Holiday Blog Hop.

The hop starts here with Melin Beltran followed by......

Joanna Wright (that's me!)

 Michelle Price (Your next blog hop stop).


Remember, to please leave a comment on each blog  for a chance to WIN a 
Digital CD Download 

Joanna x

Please follow my blog via.....

Follow on Bloglovin

Electronic Die Cutter 468x60

Thousands of Images 468x60

Current challenges entered :-
My Craft Spot - Christmas Shaped Cards
ABC Christmas Card Challenge - Non square creations
Wobble Wednesday Challenge - Action Wobble with CAS card
i Gotta Create - Wildly Original Link Party
Die Cuttin Vivas - Happy Holidays

Thanksgiving Frame


I am dedicating this post to all my crafting followers that celebrate Thanksgiving.  
"Wishing you a blessed weekend with your families".

I purchased this distressed frame from a local store, very cheaply, and thought it would be great to add a simple Thanksgiving printable.  I cut my patterned paper to fit the frame which can be done using a paper trimmer or your cutting machine.

I then printed out the Subway Art - Thanksgiving printable using my printer options, but it could easily be resized in you Pazzles software is you so wished.


I then cut out a leaf with my Pazzles Inspiration cutting machine using brown cardstock which I embossed using one of my Cuttlebug folders.  I then layered it onto the patterned paper and adhered onto my frame using a sticky glue dot. 


Finally, I added some embellishments to the top, left corner of my frame from my crafting stash.

A simple, quick frame which can easily be altered for the next festive holiday.

Supplies used for this project:-
Thanksgiving Printable - LD Holiday Subway Art
Layered Leaf - LD Seasoned Fall
Cutting Machine - Pazzles Inspiration 99.00 Dollar Special

Click images below for more detail.


Free Product

Tuesday 26 November 2013

Thanksgiving - Pilgrim Hat Gift Box


Here, is a project dedicated to all my fellow crafter's who celebrate Thanksgiving.  Sadly, we don't celebrate Thanksgiving here in the UK, but I can't help creating projects....they are such FUN!  I made my Thanksgiving Pilgrim Hat gift box using one of the LD Cut It Project files called Gobble Gratitude.


Here are the pieces cut out. I was so excited when the project came together, especially when I realised that it made a little gift box depending on how you assemble it!


I Print & Cut the little tag Happy Thanksgiving using my Pazzles Inspiration.

Electronic Die Cutter 468x60


I love the little buckle and hat band.  


Supplies used to make this project:-
Thanksgiving Pilgrim Hat - LD Gobble Gratidude
Happy Thanksgiving sentiment - LD Stuffing Stitchy
Kaisercraft - On This Day - patterned paper - The Mulberry Bush
Cutting Machine - Pazzles Inspiration

Don't forget to check out the LD Simple As Pie Bundle of cutting files for only $25*, but if you use Coupon Code: NovemberThanks at checkout it will bring the price down to $21. 
*valid till midnight, Friday, 29th, MST.


Happy Thanksgiving ~ Joanna

Linking up to:-
i Gotta Create - Thanksgiving
Die Cuttin' Divas - Thank You Challenge
Polkadoodles - Give Thanks

Monday 25 November 2013

Give Thanks - Wall Hanging


Today I thought I would try to make a cheat's wooden wall hanging!  

I didn't have the correct wood to make the frame, but recently I had purchased some wood effect  paper......just perfect for my little project.


I found some wooden slats in the corner of the garage and glued them together.  I then used my Dulux tester pot of paint and painted the edges including the back of the wooden slats.  I trimmed a piece of paper from the Kaisercraft - Garage Days Collection using my cutting machine and adhered it to my painted board. I sanded some of the edges of the paper and inked around the frame using some brown Tim Holtz Distress ink.


I had just the right amount of brown vinyl to cut out my sentiment and leaf using my Pazzles Inspiration cutting machine.  I then got my husband to drill 2 holes in the top of the frame and threaded some garden twine.

I hope you like my cheat's version of a wooden wall hanging!

Electronic Die Cutter 468x60

Supplies for this project:-
Wooden slats or any piece of wood
Dulux Tester Pot of paint - Perfectly Taupe
KaiserCraft - Garage Days Collection paper - The Mulberry Bush
LD Give Thanks Flourish - Cutting file.
Tim Holtz Distress ink
Brown Vinyl
Garden Twine


You may want to take  a look at the recently released Simple As Pie Bundle of cutting files for only $25* but if you use Coupon Code: NovemberThanks at checkout it will bring the price down to $21. 
*valid till midnight, Friday, 29th, MST.


Thanks for popping by ~ Joanna

Challenge entered:-
Die Cuttin' Divas - Thank You