


After many enquiries I have just completed a Print & Cut Tutorial with my Pazzles Inspiration and Studio Pro Software using a graphics file from
It has taken me several hours to make this today and, I have a lot to learn about making videos so, please bare with me as I learn.
Please leave a comment on this blog post as I would love to have some feedback on this video when you have watched it.
Please remember there are Print & Cut tutorials in the Pazzles Craftroom and several by Klo.
Now to PREPARE your CUT!
Lay your printed sheet in the TOP/RIGHT HAND corner of your mat carefully aligning the horizontal and vertical rules on your mat.

In your software you need to select the whole page, that is your owl and registration boxes. Select 'C' on your keyboard and open up the transformation menu and select 'P' for position. Select the correct 'According to' which tells you you need to have the top/right corner of your printed paper matching the top/right hand corner of your visual mat in your software. Type in the XPos. 21 and YPos. 29.7 then apply.

On APPLY you should see everything shift to the top/right hand corner of your visual mat.
If you have got this far you are doing really well! Not long to go......
Using the directional keys at the top of your cutting machine, you need to manually move your blade to exactly the top right hand corner of your first registration box. When you think you are there just press down on the top of your blade housing and see the sharp end of the blade touch the top/right hand corner of the 1st registration box (the black box in my tutorial).

Select the black box in your CUT CONTROL PANEL

Then select CUT.
The blade should cut exactly around the 1st (black) registration box.
The blade should cut exactly around the 1st (black) registration box.

If it is slightly out, move to the NEXT registration box which is the pink box. To get all the registration colours showing again in the Cut Control Panel select ALL COLOURS.

Then select the pink box in your cut menu - cut.

If you are successful with your cut lines EXACTLY around the box you are ready to cut out your OWL pieces. If not, continue the same process with the other registration boxes.
After practise you will find you only need to test x2 of the boxes to get an exact match.
After practise you will find you only need to test x2 of the boxes to get an exact match.

DO NOT remove the mat and DO NOT move your directional keys again.
Select the cut line around your owl in your software.

Cut out elements!

Looking good?

Cute owl!
Click here if you would like to purchase and try out this tutorial using
Fallen For You - graphic set from Lettering Delights.

If you are successful with this tutorial, please support me by purchasing a few of the files below or opening an account with LD.
Click here to see all the latest released products at Lettering Delights.
Incidentally, if you have a Pazzles Inspiration there is a great video tutorial
Many thanks, and have fun with cutting out graphics and svg's using Print & Cut.
Joanna xx
Click here to see all the latest released products at Lettering Delights.
Incidentally, if you have a Pazzles Inspiration there is a great video tutorial
Using Cutting Files for Print and Cut Projects
in the Pazzles Craft Room which will help you prepare the Registration Boxes for Print & Cut projects.Many thanks, and have fun with cutting out graphics and svg's using Print & Cut.
Joanna xx
Coming Soon, Inspiration Vue (click image below)
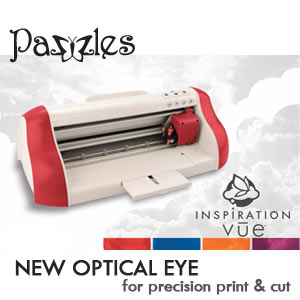
Click above image or following link if you would like to learn more about the NEW Inspiration Vue - $99 deal with the NEW optical eye for precision Print & Cut.

